Tutorial: Deploy a Sample App That Uses GitHub Webhook-Based Approval
Objectives
This tutorial shows you how to configure webhook-based approvals using GitHub. You perform the following tasks:
- Create credentials
- Create the webhook event and workflow
- Configure the webhook in your deployment file
- Call the webhooks in your deployment process
- Deploy your updated process
Before you begin
- You have read the webhook-based approvals introductory page.
- You are familiar with workflows and webhooks in GitHub.
- You have completed the Deploy a Sample App Tutorial guide. You use the same
docs-cdaas-samplerepo that you forked and cloned as part of that tutorial.
Create credentials
You need to create credentials that enable GitHub and Armory CD-as-a-Service to connect to each other.
Create a personal access token in GitHub with workflow and admin:repo_hook permissions. See the GitHub Creating a personal access token guide for instructions. Copy the token value for use in the next step.
Create a new secret in the CD-as-a-Service Console for the GitHub token you just created. Go to the Secrets > Secrets screen. Click the New Secret button.
- Name:
github_personal_access_token - Replacement Value:
<github_personal_access_token_value>
Replace
<gigithub_personal_access_tokenn_value>with your token value. You use this secret when configuring your webhook in your deployment file.- Name:
Create a new CD-as-a-Service credential for your webhook callback to use for CD-as-a-Service authentication. In the CD-as-a-Service Console, go to the Access Management > Client Credentials screen. Click the New Credential button. On the Create New Client Credential screen:
- Name:
github_webhooks - Select Roles: select
Deployments Full Access
Click Create Credential. Copy the Client ID and Client Secret values for use in the next step.
- Name:
Create two GitHub repo secrets in your fork of the
docs-cdaas-samplerepo. See GitHub’s Creating encrypted secrets for a repository for instructions. Your webhook callback uses the value of these secrets to authenticate to Armory CD-as-a-Service. Create your repo secrets with the following names and values:Name: CDAAS_CLIENT_ID Value:
<github_webhooks_client_id>Replace
<github_webhooks_client_id>with the value of the Client ID you created in the previous step.Name: CDAAS_CLIENT_SECRET Value:
<github_webhooks_client_secret>Replace
<github_webhooks_client_secret>with the value of the Client Secret you created in the previous step.
Create the webhook event and workflow
Be sure to enable workflows in your fork of the
docs-cdaass-samplerepo.
You can create a repository_dispatch webhook event when you want to trigger a workflow from outside of GitHub. Review the following GitHub repository_dispatch docs if you’re unfamiliar with this type of webhook event:
The docs-cdaas-sample repo contains a basicPing.yml webhook workflow file in the .github/workflows directory. The webhook workflow obtains an OAUTH token, extracts the callback URI, and sends a POST request to that callback URI.
You must include specific keys and values as detailed in the following sample:
| |
Note:
on.repository_dispatch.types: User-supplied event type name. You use this name in the payload when you call this webhook event from Armory CD-as-a-Service.The
getTokenstep fetches an OAUTH token from Armory CD-as-a-Service. The format for this API call is defined in Retrieve an OAUTH token to use in your callback. The callback needs this OAUTH token to authenticate with Armory CD-as-a-Service.- In the
datapayload, you use theCDAAS_CLIENT_IDandCDAAS_CLIENT_SECRETGitHub repo secrets you created in the Create credentials section.
- In the
The
callCallbackstep sends request with workflow results to Armory CD-as-a-Service. The format for this API call is defined in Callback format.url: GitHub extracts thecallbackUrifrom the HTTP Request that Armory CD-as-a-Service sent.method: Rest API method is alwaysPOSTbearerToken: GitHub extracts theaccess_tokenvalue from thegetTokenstep’s HTTP Response and inserts it here.customHeaders: this is always{ "Content-Type": "application/json" }data: this JSON payload must contain a"true"or"false"value for"success". The"mdMessage"value should be user-friendly and meaningful.
Configure the webhook in your deployment file
The docs-cdaas-sample repo contains a second deployment file called deploy-webhook.yml in the root directory. The webhooks section is at the bottom of the file.
The uriTemplate uses secrets instead of hardcoding the URI. If you don’t want to create secrets, be sure to change to uriTemplete to use your GitHub org and repo. To create secrets using the CD-as-a-Service Console, go to Secrets > Secrets and create two new secrets:
- Name:
github_org; Value: the name of the GitHub org into which you forked thedocs-cdaas-samplerepo. This is either your business org, like ‘armory’, or your GitHub username. - Name:
github_repo; Value: the name of the GitHub repo into which you forked thedocs-cdaas-samplerepo. This is most likelydocs-cdaas-sample.
The following is an example of how to configure a GitHub webhook workflow:
| |
Note:
name: User-supplied name, in this tutorialbasicPing; you use this name when you insert configuration to call this webhook.uriTemplate: the format for this URI is in GitHub’s Create a repository dispatch event. Since this is a template, you can insert secrets in place of hardcoding parts of the URI.networkMode:directbecause the webhook endpoint is accessible via the internetheaders: For theAuthorizationvalue, usetoken #{{secrets.github_webhook_token}}. The secret name matches the name you used in the Create credentials section.bodyTemplate.inline: The format for this is defined in GitHub’s Create a repository dispatch event.- The
event_typemust match theon.repository_dispatch.typesvalue in thebasicPing.ymlfile. - The items in the
client_payloaddictionary depend on the functionality within thebasicPing.ymlfile. ThebasicPingworkflow looks forcallbackUri. ThecallbackUrivalue is always{{armory.callbackUri}}/callback. Armory CD-as-a-Service dynamically generates and fills inarmory.callbackUriat runtime.
- The
Call the webhooks in your deployment process
The deploy-webhook.yml calls the webhook workflows in the constraints section of the deployment target definition. Look for runWebhook entries such as the following:
| |
runWebhook.name must match the name you gave the webhook in the webhooks section.
Deploy your updated process
The deployment process calls the basicPing webhook workflow when deploying to the staging target. The webhook must be successful for deployment to continue to the prod targets.
Navigate to your docs-cdaas-sample directory. Make sure you have logged in using the CLI (armory login).
Deploy the using the deploy-webhook.yml file.
armory deploy start -f deploy-webhook.yml
Output is similar to:
[2022-04-28T18:09:31-05:00] Deployment ID: 8c9e77fa-2543-4cdc-b12f-86c095974c7a
[2022-04-28T18:09:31-05:00] See the deployment status UI: https://console.cloud.armory.io/deployments/pipeline/8c9e77fa-2543-4cdc-b12f-86c095974c7a?environmentId=a8906e61-2388-4daa-b38e-4339390b9447
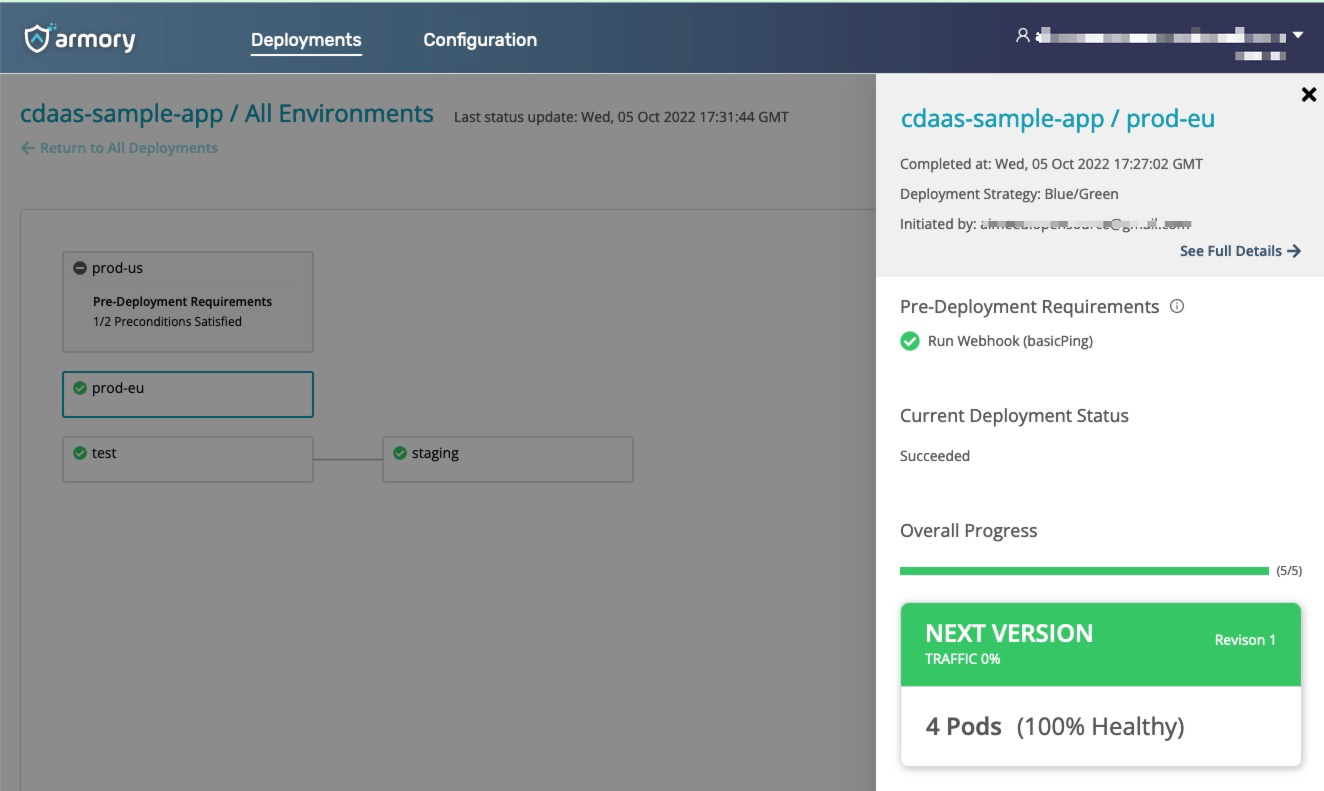
You can check deployment status by accessing the URL included in the output.
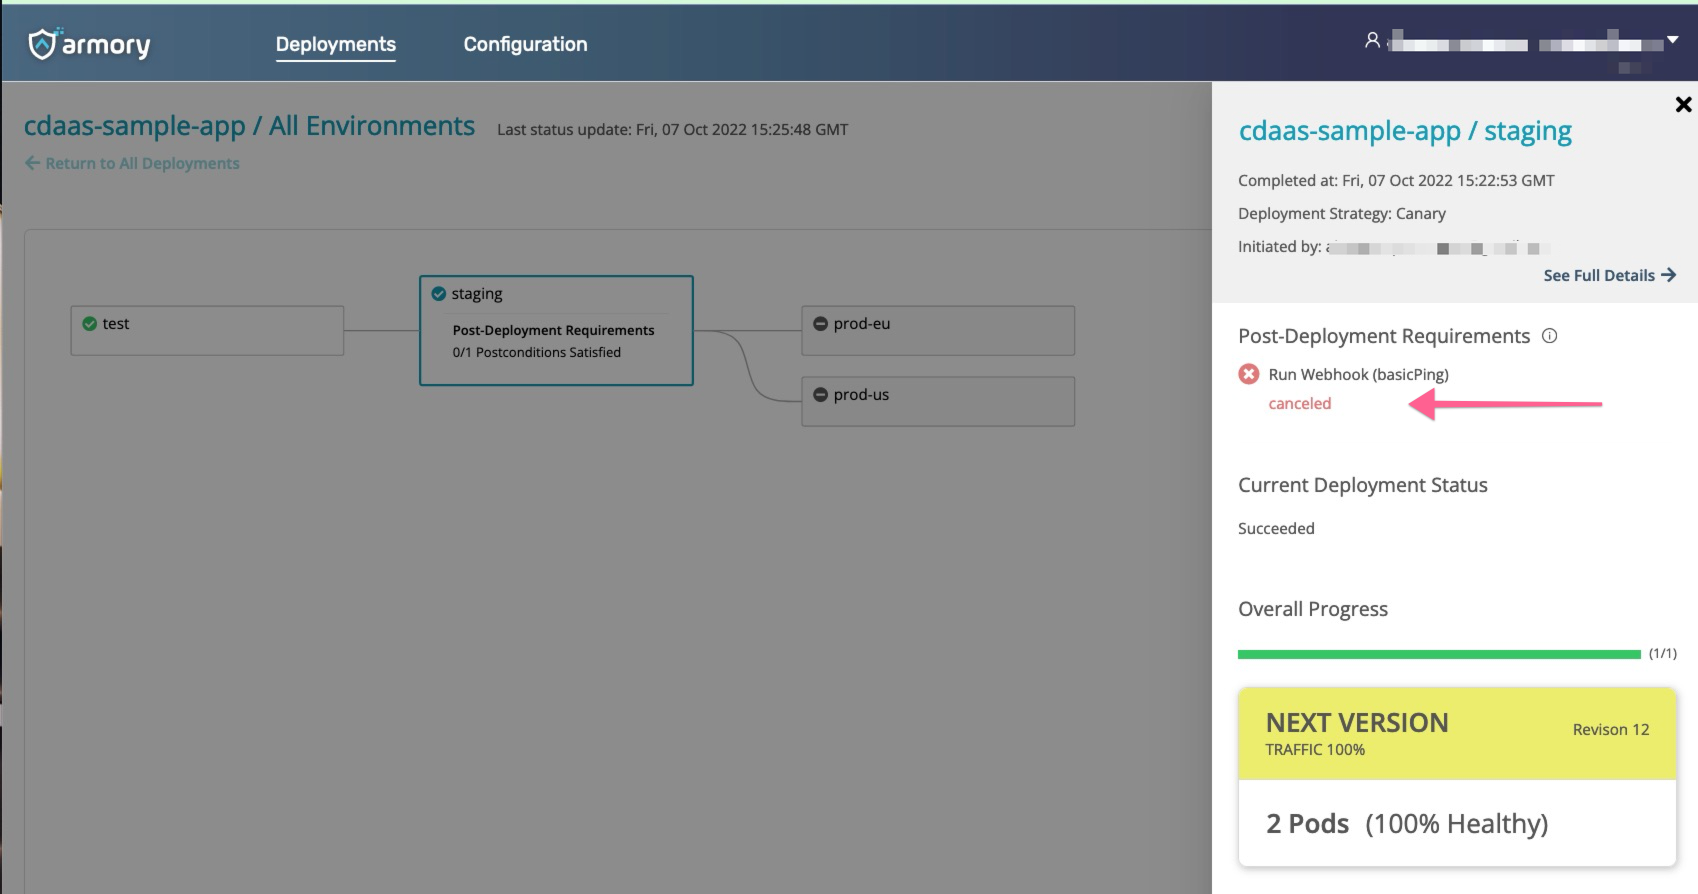
To see what webhook failure looks like, go into your GitHub repo and change the basicPing.yml file line 28 like this:
| |
Commit the change.
Deploy by running armory start deploy -f deploy-webhook.yml. Then check deployment status by accessing the URL included in the output. CD-as-a-Service cancels the deployment when it receives a failure message from the webhook.
What’s next
Troubleshoot WebhooksFeedback
Was this page helpful?
Thank you for letting us know!
Sorry to hear that. Please tell us how we can improve.
Last modified October 31, 2023: (f370fe9)