Invite and Manage Users
Use the Armory CD-as-a-Service Console to invite a user to your CD-as-a-Service organization.
User accounts overview
For your users to get access to Armory CD-as-a-Service, you must invite them to your organization. This grants them access to the Armory CD-as-a-Service UI. Depending on their permissions, they may have access to different parts of the UI.
Before you begin
- You have read the Identity and Access Management Overview, which explains the relationship between organizations, tenants, and users.
- You need to create at least one role or your user won’t be able to access CD-as-a-Service. See Create and Manage RBAC Roles.
- You need the user’s name and email address. Note that the email domain must match your organization’s format. For example, users that work for Acme (which uses
username@acme.com) must have@acme.comemail addresses. Users are automatically added to your organization once they accept the invite and complete the sign up.
Important
- A user can belong to only one CD-as-as-Service Organization (company account). If you try to invite a person that already belongs to another org, you get a
409 Conflict: The user already existserror. - A user can have access to multiple tenants within a single org.
Invite a user
- Access the CD-as-a-Service Console.
- Navigate to Access Management > Users.
- Click Invite Users
- Enter the new user’s full name in the Name field and the user’s email address in the Email field.
- Select at least one role from the Roles drop down list.
- Click Send Invitation.
- A modal window opens. Review the information and click OK to send the information or Cancel to return to the previous screen.
The new user receives an email with instructions for accessing the CD-as-a-Service Console.
Two-Factor authentication
CD-as-a-Service requires two-factor authentication (2FA) when logging in. When setting up 2FA, a new user can use any 2FA authenticator that can scan a QR code.
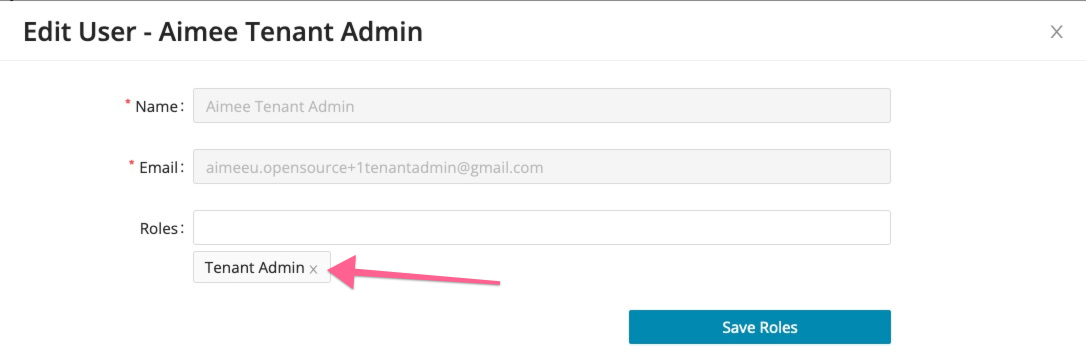
Assign a role
- Access the CD-as-a-Service Console.
- Navigate to Access Management > Users.
- Find the user you want to update. Click the pencil icon to open the Edit User screen.
- In the Edit User screen, place your cursor in the Roles field and click.
- Select a role from the drop-down list. Repeat if you want to assign the user more than one role. Selected roles appear below the Roles drop-down list.
- Click the Save Roles button.
Revoke a role
- Access the CD-as-a-Service Console.
- Navigate to Access Management > Users.
- Find the user you want to update. Click the pencil icon to open the Edit User screen.
- In the Edit User screen, you can see a user’s roles listed below the Roles field.
- Each assigned role has an x next to it. Click the x to remoke the role.
Feedback
Was this page helpful?
Thank you for letting us know!
Sorry to hear that. Please tell us how we can improve.
Last modified October 31, 2023: (f370fe9)